Use the following steps if your customer sent one payment to cover several invoices that are in different Accounts Receivable (A/R) accounts. Note that QuickBooks only allows one A/R account per Journal Entry, which is why we need to use a wash account when moving balances between A/R accounts.
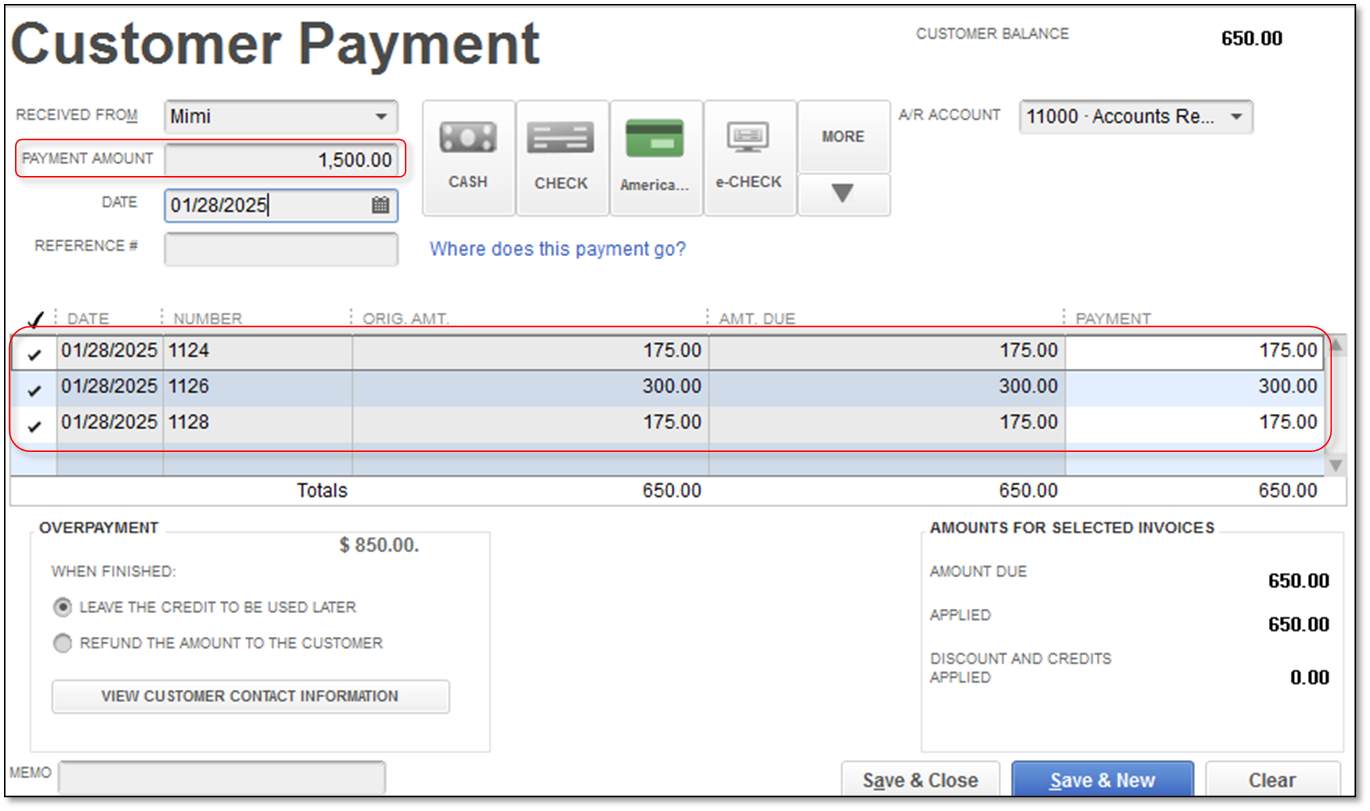
- Apply the full check amount to Invoice(s) in one of the A/R accounts.
- From the Customers menu, select Receive Payments.
- Click the A/R Account drop-down, and select the first A/R account.
- Enter the full amount of the check.
- Choose the Invoice(s) you want to apply part of the payment to, leaving the remainder as a credit.

- Move the credit from the first A/R account to a ‘wash’ account.
- From the Company menu, select Make General Journal Entries.
- On the first line, choose the first A/R Account then enter the Customer name and the amount in the Debitcolumn.
- On the second line, choose (or create new) a ‘wash’ account and in the Credit column, enter the amount you want to move from the’ A/R1’ account.
- Select Save & Close.

- Move the credit from the 'wash' account to the second A/R account.
- From the Company menu, select Make General Journal Entries.
- On the first line, choose the second A/R account, enter the Customer name and enter the amount in the Credit column.
- On the second line, choose the ‘wash’ account then enter the amount in the Debit column.
Note: Continue with Journal Entries until you have all the credit spread to the different A/R accounts with the customer name attached. When you are done, the balance to the ‘wash’ account should be zero.
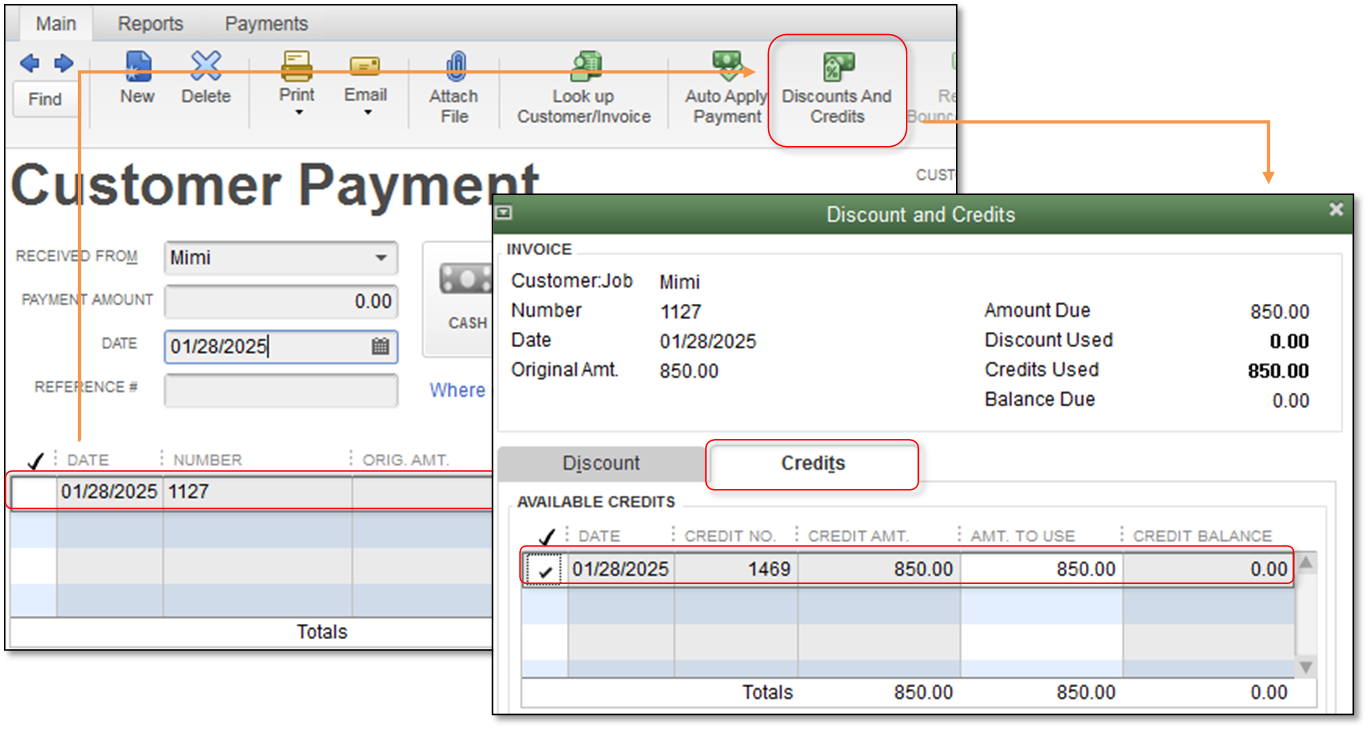
- Apply the credits in the remaining A/R accounts to the invoice(s).
- From the Customers menu, select Receive Payments.
- Select the customer:job and the A/R Account.
- Highlight the invoice you want to apply the credit to (do not put a check mark in the box as amount due in the top ‘Amount’ field, as a new payment instead of applying the existing credit).
- Select the Discounts and Credits button.
- Use the available credit to pay the invoices.

