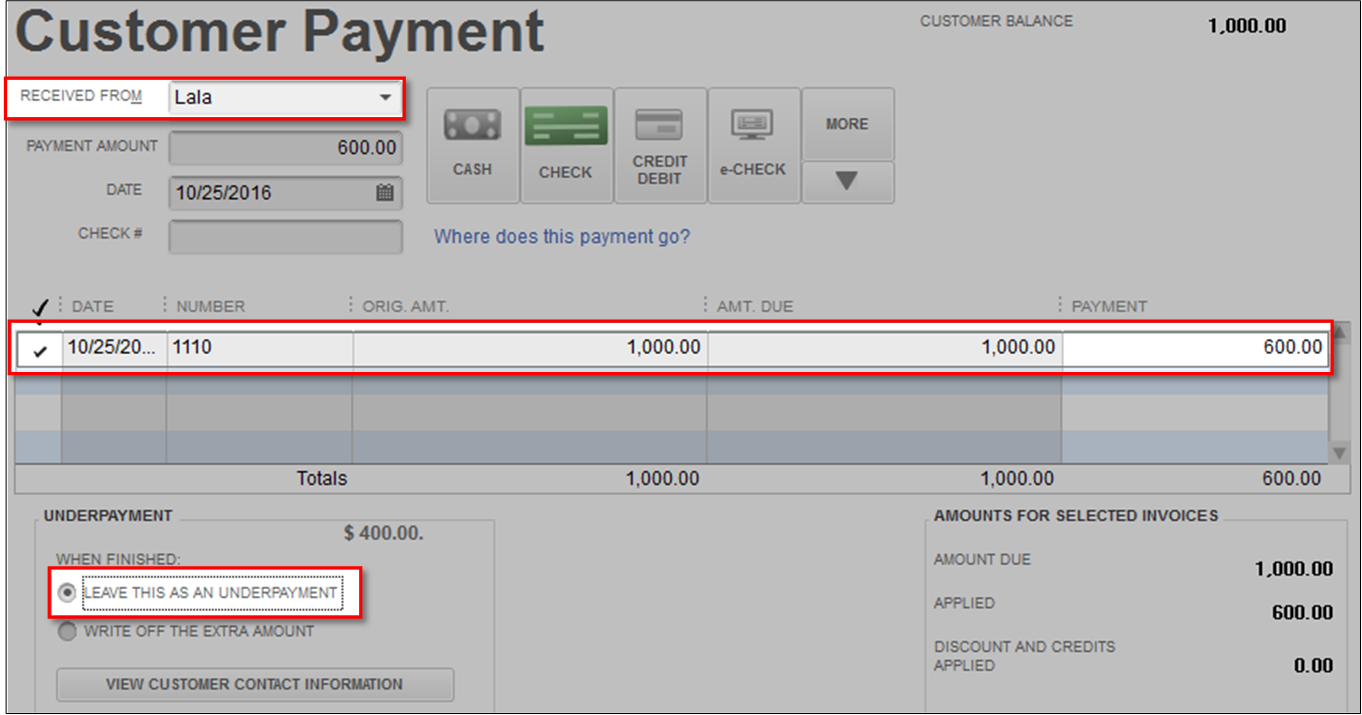
- Receive payment from the customer and leave balance as underpayment.
- From the Customer menu, choose Receive Payments.
- Select the customer/job.
- Choose the invoice and enter the amount that the customer is paying.
- Select Leave as Underpayment.
- Click Save & Close.
- Create a clearing account.
- From the Lists menu, select Chart of Accounts.
- Click the Account drop-down and select New.
- Choose Income as account type and select Continue.
- Use Clearing as account name and choose Save & Close.
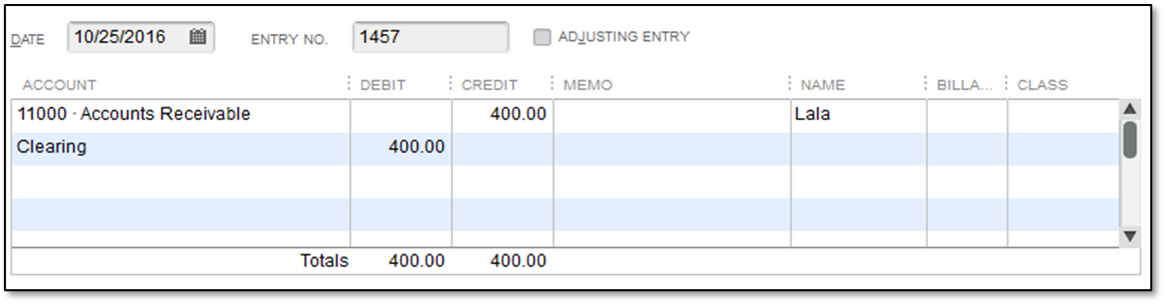
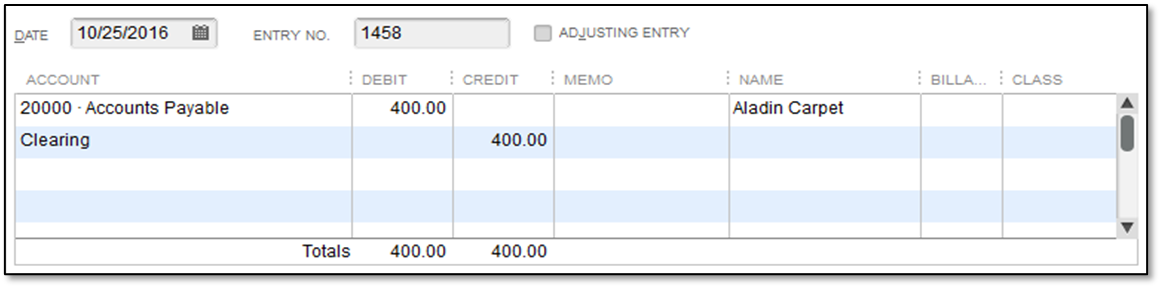
- Create two journal entries to move customer balance to your vendor.
- From the Company menu, select Make General Journal Entries.
- Assign Date and Entry No. if necessary.
- The first journal should be Credit to Accounts Receivable and Debit to Clearing account. Make sure to select the right customer in Accounts Receivable line.
- The second journal should be Debit to Accounts Payable and Credit to Clearing account. Make sure to select the right vendor in Accounts Payable line.
- Apply credit to vendor's bill.
- From the Vendors menu, select Pay Bills.
- Select the appropriate vendor and bill.
- Click Set Credits
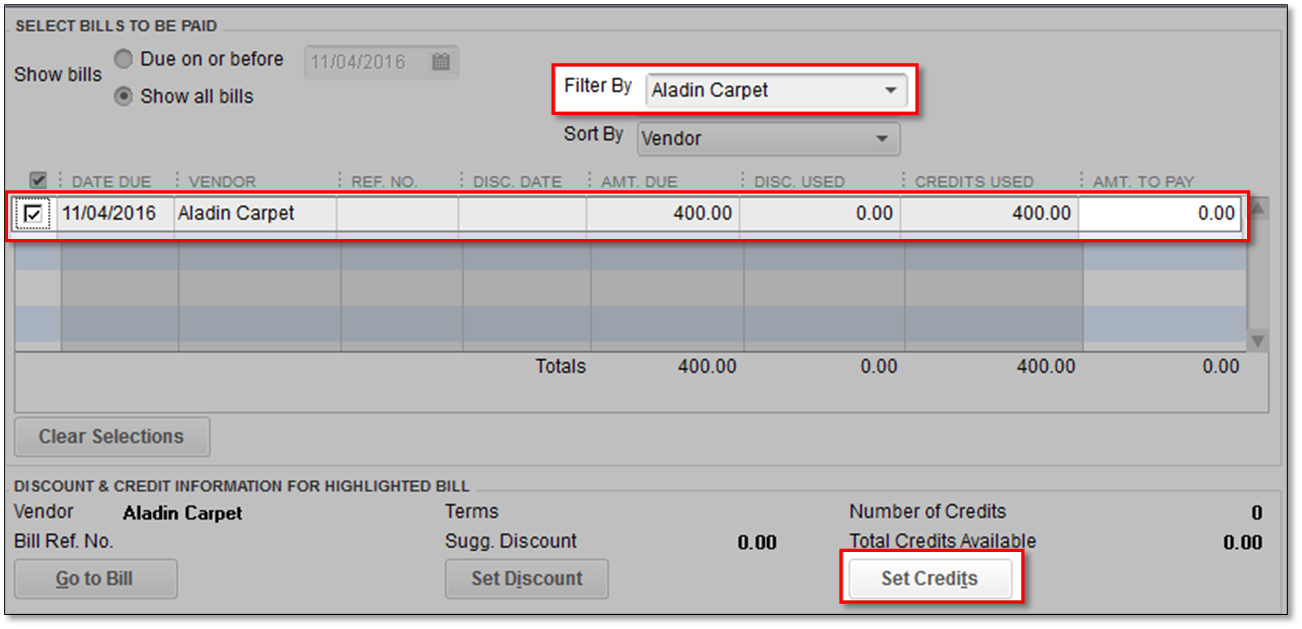
- Select the appropriate credit and click Done.
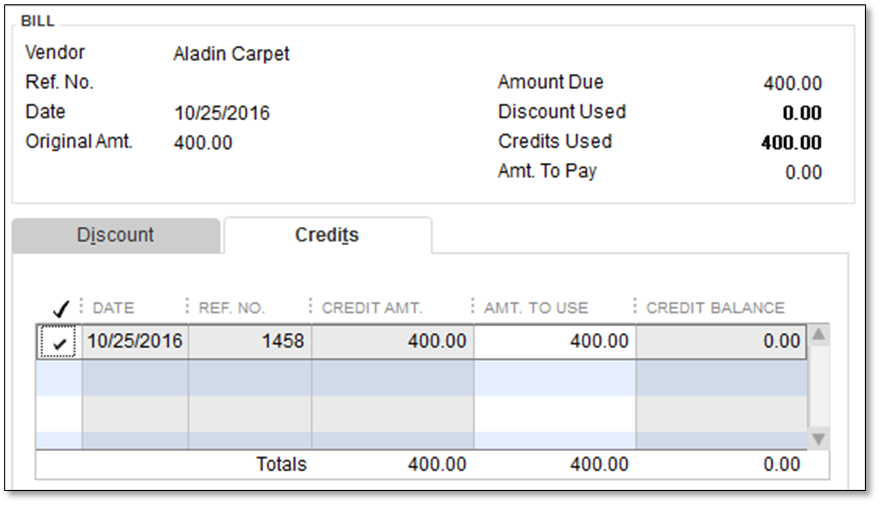
Note: The credit shows in the Credits Used column. (If there is a remaining balance, you can enter the amount you need to pay in the Amt. to Pay field. - Select Pay Selected Bills.
IF Your customer paid your vendor directly for the materials you used to provide service to them Print
Modified on: Thu, 16 Aug, 2018 at 1:13 PM
Did you find it helpful? Yes No
Send feedbackSorry we couldn't be helpful. Help us improve this article with your feedback.